Store-bought dog toys are great but if you have an aggressive chewer at home, you might end up spending a fortune to entertain your pup. Even the most expensive heavy-duty toys may sometimes last a few minutes in your pup’s mouth. One trip to the kitchen and you will come back to pieces of the beloved toy. The solution? Make your own dog pull toys.
This DIY project can seem intimidating but if you have the right tools and know what to do, it is by far the easiest. It is also absolutely safe for your adorable dog. In this guide, we give you a step-by-step procedure on how to make a dog pull toy braided rope at home.
The Material of Choice
When making a pull dog toy, there are a number of materials to consider. However, fleece tops the list anytime. It is universal, dog-safe, readily available, and easier to work with. If you have a small toy, it is especially easy on his teeth. Some of the sturdier materials in the market can wreak havoc on his poor teeth.
Fleece also has a good stretch to it and makes playtime fun and rewarding. It is also machine-washable and sufficiently robust. You can find fleece in virtually any local and online pet store.
First-time DIYers should stick to light to medium-weight materials. Otherwise, if you are a veteran or have a large dog, go for heavy-weight fleece instead. Blankets and garment fabrics are great if you want to upcycle. The color or pattern is entirely up to you.
If you prefer using another material, choose one that is clean and free of glue, particularly those that are often used to affix cloth labels. Glue can be toxic to your dog.
Avoid fabrics that are weak or those that tend to shred easily into threads because they can be a choking hazard to your pup. And if your pup is a strong chewer, choose a stronger fabric that he won’t be able to shred into smaller pieces fast. Besides being a choking hazard, small pieces of fabric can create digestion problems to your pup if they get stuck in his digestive track.
If you decide to use old jeans or denim, remember to trim any loose threads as the rope toy ages to prevent your canine friend from swallowing the loose strings, which can be harmful to your pup’s gut.
Related Post: 17 Safe Dog Chews for Aggressive Chewers
What You’ll Need
· Polar fleece or any other stretchy fabric of your choice
· A sharp knife or pair of scissors
· A measuring tape
Procedure
1. Getting The Perfect Size
Decide the size of rope toy to use. The size of the fleece material heavily depends on the size of your dog. In this guide, we focus on a medium-sized to a slightly large breed. We’ll use three strips to form the braid. If you have a large dog, you will certainly require a bigger material. In this case, you will ultimately have three wider strips or 6 narrower ones. If you go with the latter option, you will have about 12 strips at the end. Braiding 12 strips is no mean feat. It is possible though. Rookie creatives may want to stick to three wider strips instead. To make braiding easier and convenient, simply roll the strips a little to get a good handle on them.
If your dog is much smaller, you can scale down. Make the strips thinner than the original measurements. A good rule of thumb is to use strips of 2 inches wide for tiny breeds. Add one more inch for a slightly bigger canine. The resulting pull toy will be much thinner so your baby’s tiny mouth can grab the toy.
2. Cut The Strips
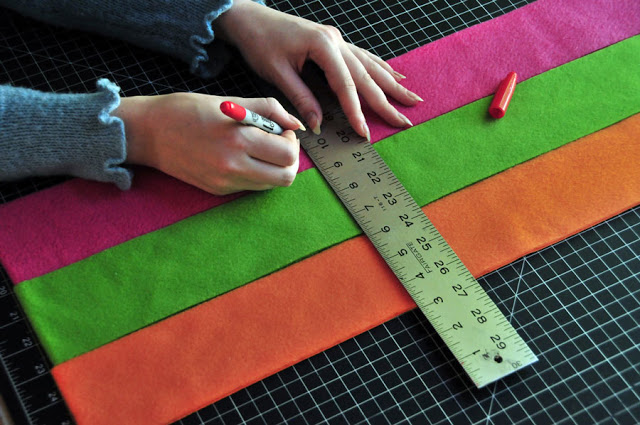
Cut the fleece into three equal parts. Use the tape measure to get the right measurements. If you are using an old T-shirt or any other fabric, you want to make 3-inch-wide slits at the bottom. After cutting, simply rip the slits with your hands and you will end up with uniform strips. Feel free to use things like old pants and cotton dresses for this. The principle is the same; slice it up into equal parts.
Ensure that you understand the fabric grain or the way the fabric hangs and drapes. We recommend cutting the fabric along the lengthwise grain as it helps the fabric to stretch better. An easy way to find out the direction that offers the best stretch is to give the fabric a tug in one direction. If it doesn’t stretch well, pull it in the opposite direction. You will be able to note the direction that offers the best stretch immediately.
3. Braiding
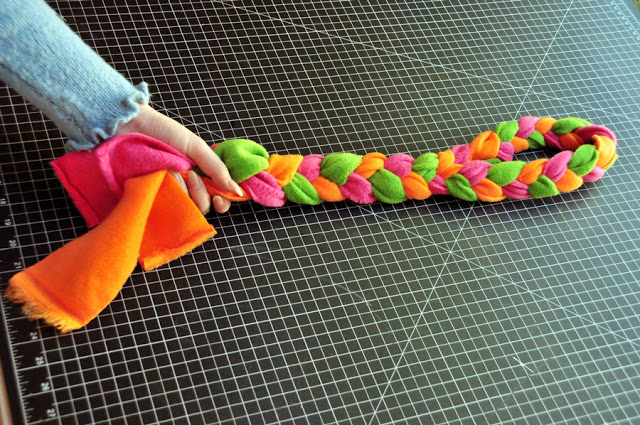
Once you have the slits or strips, it’s now time to braid it up. There’s no rocket science here. Simple lay the strips on a flat surface somewhere (a table or counter is perfect) and twist the strips over each other in a braided fashion. Start in the middle of the strips and work on the first half first. Make the braids tight so that you don’t create a weak link that can be ripped apart by your dog during play. Keep twisting until you are close to the end of the strips (about 1/3 inch). When you reach here, make a tight loop.
If you are using an old fabric, divide the pieces into thirds, tie them up, and start braiding towards the end. Stop when you are close to the end and make another tight loop.
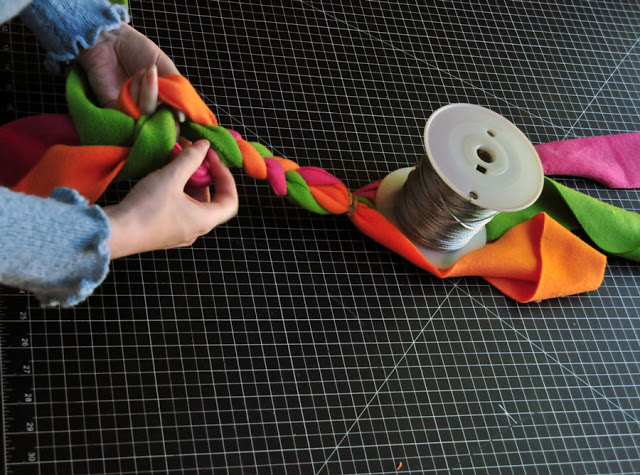
4. Looping
Making the loop is sometimes easier said than done. It can easily come apart if it is not done right. If you are making a pull toy for a tiny dog breed, making the tug is relatively easier. However, if you own a big boy, you need more material, meaning more strips—which translate to a harder time making the loop.
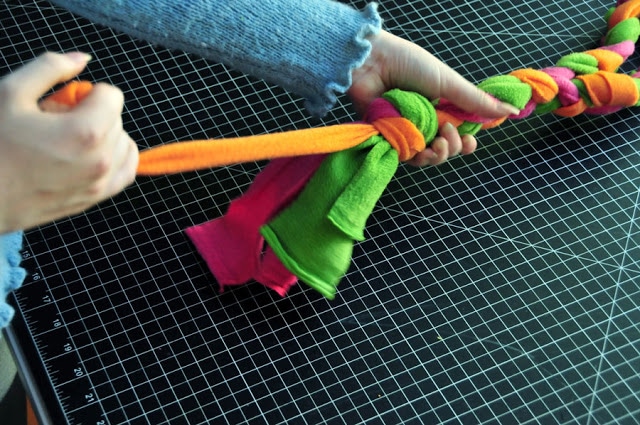
If you stick to three strips, expect them to be much wider. Braid the handle bit of the dog toy then go straight to the tug before you braid the other side. At different lengths of the toy, take another segment of tug and build a new section on to a single strip with a tiny knot.
If you want to bind all the strips consecutively, you will have a huge mess for a dog pull toy. About two-thirds of the strip length, repeat the same process with the second strip and keep going. If one strip becomes too short, tie it with the remainder from the first strip. Keep going until all the material is utilized then make a super tight knot.
Whatever you do, ensure the tug toy is tight. Your dog will grab the ends with his teeth perhaps more than other parts of the toy. Even with a gentle canine buddy, the knot will be easily dismantled in a matter of seconds.
If something isn’t clear in our guideline, here is an excellent video (by Pickles Pets) that you can watch for more insight:
A Few Handy Tips on How to Make Dog Pull Toy Braided Rope
- Once you’ve gotten the hang of making basic dog pull toy braided rope, you are free to try other fancier and more advanced braided dog pull toys. For instance, you can try advanced knotting techniques like the four-strand braid aka Lanyard Stitch. If you manage to master this, you will have an opportunity to make for your pup a wonderfully rounded braided rope that makes for a beautiful and durable tug or pull toy.
- After a few weeks or months of play, you will notice that the loop or the knotted end becomes stretched out. This is perfectly normal. You can either leave it as-is or re-tie it to make a stronger, double knot.
- Like most dog toys, braided dog pull toy should only be used under appropriate supervision. Your dog may not only chew off pieces of the fabric but things like strings and buttons can come off and cause a choking hazard. You know your pup better—if he likes getting himself in trouble, he will if you leave him with a braided pull rope toy unsupervised.
- One of the benefits of making a braided rope toy for your dog is the fact that it is free and cheap. So, if you notice that your current tug toy is showing signs of wear and tear, fix it immediately or replace it with a new one.
- Some dogs have high energy and will simply go crazy without toys. If your dog fall this category, ensure that he has access to plenty of toys that you can switch regularly to keep them fresh and fun to play with. To ensure that your canine friend always has something new and fun to play with, choose a few toys from our lists below:
5 Best Spring Pole Stands for Dogs
10 Best Motion Activated Dog Toys
8 Best Chew Guard Technology Dog Toys
Top 10 Freezable Teething Toys for Puppies
10 Best Toys for Goldendoodles
15 Best Dog Toys You Can Put Peanut Butter in
8 Best Jumping Activation Ball for Dogs (Plus Why Your Dog Needs One)
Final Thoughts
As you can see, making a DIY dog pull toy braided rope is quite straightforward. The trick is getting the braiding right so it doesn’t leave weak links that can harm your dog. Tugging should also be done with care and caution. Now you can engage your dog in a pulling competition and enjoy the fruits of your labor.
Images credit: Soimakestuff
As an Amazon Associate, we may receive a small commission from qualifying purchases but at no extra cost to you. Learn more. Amazon and the Amazon logo are trademarks of Amazon.com, Inc, or its affiliates.